
Flying can be an exciting adventure, but let’s be honest: the preparation can feel like a stressful, overwhelming chore. From booking the right ticket to packing your bags and navigating the airport, a single missed step can turn your dream trip into a travel nightmare. But it doesn’t have to be that way.
What if you could walk into the airport feeling calm, collected, and completely in control? What if you knew exactly what to do and when to do it, eliminating that last-minute panic? This guide is your new pre-flight playbook. We’re breaking down how to prepare for your flight like a pro, with a detailed, step-by-step timeline. Forget the stress. It’s time to make your travel experience smooth from the moment you book to the second you land.
Key Takeaways for a Stress-Free Flight
- Start Early: Professional preparation begins months, not days, before your flight. Check passports, visas, and health requirements first.
- Be Strategic: Your booking choices (airline, layovers, fare type) and packing strategy (carry-on vs. checked) have a huge impact on your travel day.
- Digitize and Organize: Use your airline’s app, check in online, and keep all documents in one easily accessible digital or physical folder.
- Master the Timeline: Know exactly what to do one week, 72 hours, 24 hours, and the day of your flight to eliminate last-minute rushing.
- Prepare for the Unexpected: Pro travelers are ready for delays, know how to stay comfortable in-flight, and understand airport security rules inside and out.
The Booking Phase: 6 to 12 Months Before Your Flight
The secret to a stress-free flight begins long before you even think about packing. Your choices during the booking phase set the foundation for your entire trip. Rushing this step or overlooking key details is a rookie mistake. A pro traveler is meticulous from the very start.
Step 1: Passport, Visa, and ID Check (The Non-Negotiable)
Before you browse a single flight, grab your passport. This is the single most important step. Many travelers have had their trips canceled before they even began by overlooking these details.
- Passport Validity: Check the expiration date. Many countries require your passport to be valid for at least six months *after* your planned departure date from that country. Don’t get caught by this rule. If your passport is expiring within the next year, start the renewal process now.
- Visa Requirements: Use official government websites (like the U.S. Department of State) to check the visa requirements for your destination *and* any layover countries. Some countries require a transit visa even if you’re just passing through for a few hours. Visa application processes can take weeks or even months, so this is your first priority.
- ID for Domestic Travel: If you’re flying domestically (e.g., within the U.S.), ensure you have a REAL ID-compliant driver’s license or another accepted form of identification. The deadlines for these requirements can change, so check official sources like the TSA website.
Step 2: Choosing the Right Flight Strategically
Don’t just click the cheapest flight you see. The “best” flight is a balance of cost, convenience, and comfort. A pro thinks about the *total experience*.
- Time of Day: Early morning flights are less likely to be delayed, as cascading delays from other flights haven’t built up yet. However, they also mean a very early wake-up call. Red-eye (overnight) flights can save you a night’s accommodation but can be tough if you can’t sleep on planes.
- Layovers (Connections): A non-stop flight is almost always preferable. If you must have a layover, be strategic. A 45-minute connection might look efficient, but it’s a high-risk gamble. A single small delay, a long walk between terminals, or a slow security line could make you miss your connection. A pro buffer is at least 90 minutes for domestic layovers and 2-3 hours for international ones.
- Airline Choice: Don’t just compare price. Consider baggage allowances, on-time performance, and in-flight amenities. A slightly more expensive flight on a reliable airline can be worth its weight in gold compared to a nightmare experience on a budget carrier that charges for everything.
Step 3: Understanding Fare Types (Baggage and Seat Selection)
That “Basic Economy” fare looks tempting, but it’s often a trap. Pro travelers read the fine print before clicking “purchase.”
| Fare Type | What You Likely Get | What You Likely DON’T Get |
|---|---|---|
| Basic Economy | A seat on the plane (and that’s it). | Carry-on bag, seat selection (you’ll get a middle seat), ability to change or cancel, boarding priority. |
| Main Economy | A seat, a standard carry-on, and often a checked bag (for international). | Free seat selection (you may have to pay for “preferred” seats), free changes. |
| Premium Economy | More legroom, wider seats, better meals, priority boarding, often free checked bags. | Lie-flat beds, lounge access. |
Always do the math. If you know you need to check a bag, a Basic Economy fare + a $70 round-trip bag fee might be more expensive than just booking a Main Economy ticket that includes a bag. Always book the fare that matches your needs.
Step 4: Travel Insurance: Is It Worth It?
A pro never asks “if” they need insurance; they ask “which” insurance they need. For a cheap, domestic weekend trip, you might skip it. For a $5,000 international vacation booked months in advance? It’s essential.
According to a 2023 travel insurance study, the most common claims are for trip cancellation (45%) and medical emergencies (32%). Your regular health insurance often provides little to no coverage overseas. A simple broken leg in another country could cost you tens of thousands of dollars. Travel insurance covers trip cancellations, medical emergencies, lost baggage, and severe delays. It’s the ultimate peace of mind.
One Month Before Your Flight: Setting the Stage
With your flight and insurance booked, the pressure is off… for now. This is the “calm before the storm” phase. A pro uses this time to handle the important details that last-minute travelers forget.
Step 1: Health and Vaccinations
Check the CDC (Centers for Disease Control and Prevention) website for your destination. Do you need any specific vaccinations (like Yellow Fever or Typhoid)? Some vaccination series need to be started weeks in advance. This is also the time to get refills for any prescription medications you need, ensuring you have enough to last your entire trip plus a few extra days as a buffer. Always carry your medication in your carry-on bag in its original prescription bottle.
Step 2: Booking Accommodation and Airport Transfers
Don’t wait until you land to figure out how you’re getting to your hotel. Research and book your airport transfer now. Whether it’s a shuttle, a private car, or a train, having it booked in advance saves you from a major headache when you’re tired and disoriented from your flight. Confirm your hotel or Airbnb bookings and make sure you have the address and check-in instructions saved somewhere you can access offline (like a screenshot or a notes app).

Step 3: Plan Your Itinerary and Notify Your Bank
You don’t need a minute-by-minute schedule, but have a general idea of what you want to do. Book any high-demand tickets (like major museums, shows, or tours) that are likely to sell out.
This is also the critical time to notify your bank and credit card companies of your travel dates and destinations. There’s nothing worse than landing in a new country and having your card declined for “suspicious activity.” While many banks have automated this, a quick online travel notification is a 5-minute task that can save you hours of international phone calls.
Two Weeks Before Your Flight: The Packing Prep
Okay, it’s starting to feel real. The urge to panic-pack might be creeping in. A pro resists. This isn’t the time to pack; it’s the time to *plan* your pack. This is where you separate the amateurs from the pros.
Step 1: Make Your Ultimate Packing List
Do not pack by pulling things from your closet and throwing them in a suitcase. You will forget something. Instead, make a detailed list. The best way is to categorize it.
The Ultimate Packing List Framework
- Clothes: (List by day or by type: 3x shirts, 2x pants, 1x dress, etc.)
- Toiletries: (Toothbrush, toothpaste, deodorant, skincare…)
- Medication: (Prescriptions, pain relievers, allergy pills…)
- Electronics: (Phone, laptop, chargers, power bank, headphones…)
- Documents: (Passport, ID, boarding pass, hotel info, visa…)
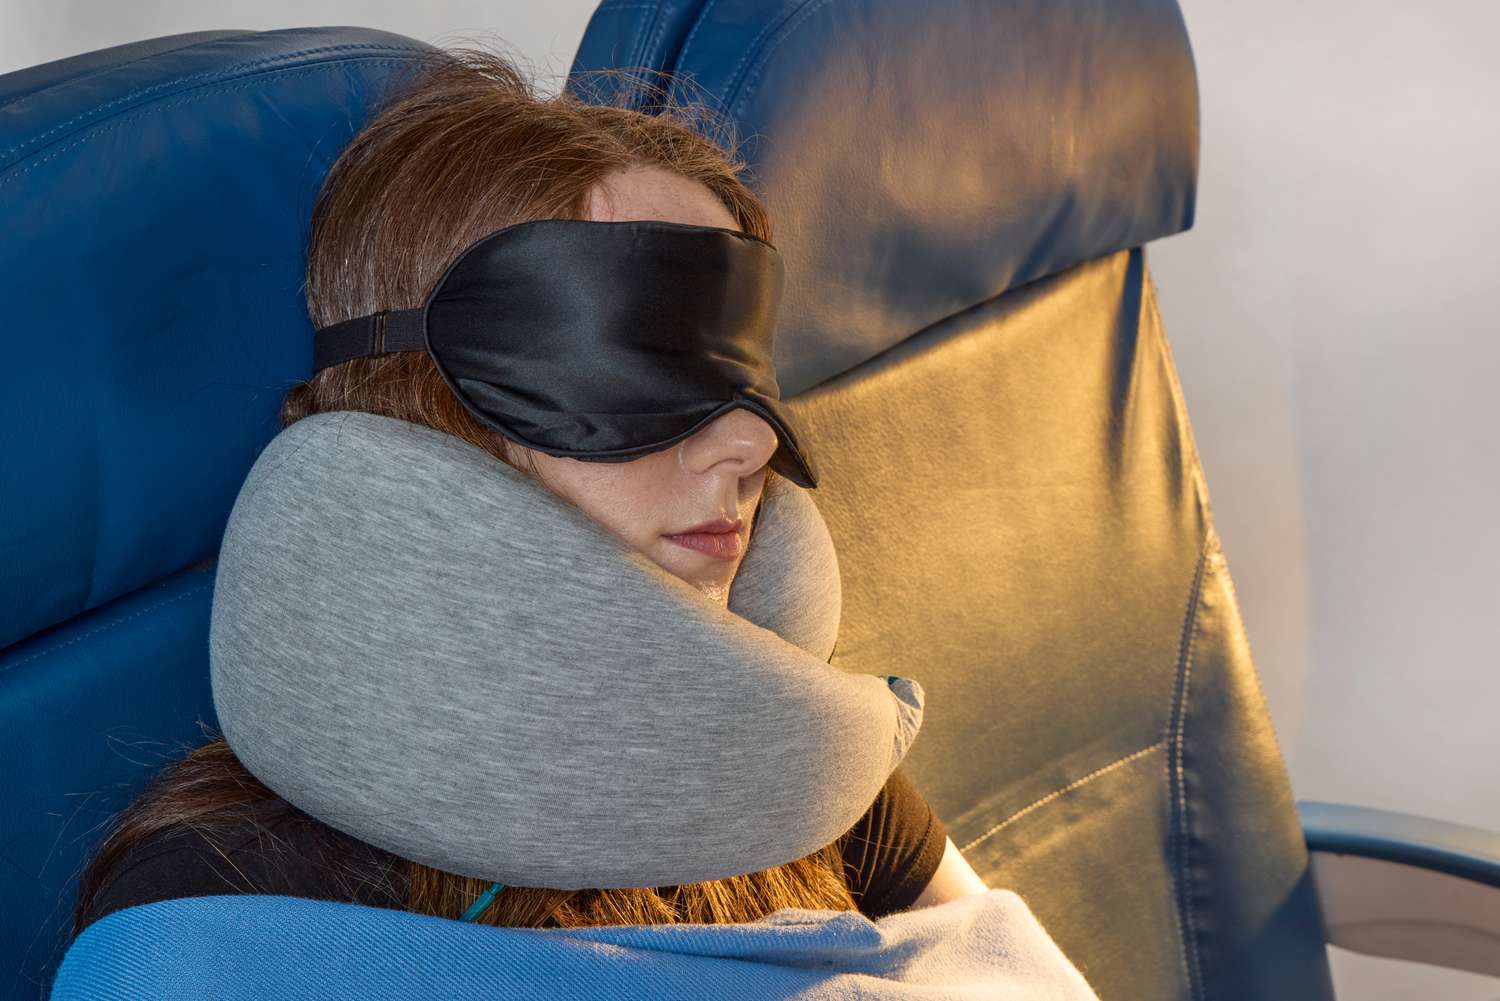
- In-Flight Comfort: (Neck pillow, eye mask, earplugs, empty water bottle…)
As you think of things, add them to this list (a note on your phone is perfect). When you actually pack, you’ll just check items off. No more “Did I pack…?” anxiety.
Step 2: Purchase Travel-Sized Toiletries
If you’re flying carry-on only, you’re bound by the TSA’s 3-1-1 rule: all liquids, aerosols, gels, creams, and pastes must be in containers of 3.4 ounces (100ml) or less, and all containers must fit inside one quart-sized, clear plastic bag.
Don’t wait until the night before to realize your favorite shampoo is in a 12-ounce bottle. Go out now and buy travel-sized versions or, even better, buy reusable silicone travel bottles and fill them yourself. This saves money and is better for the environment. Pack this clear bag now and set it aside.
Step 3: Plan Your Airport Outfit
Yes, plan it. A pro’s airport outfit is all about comfort and security efficiency. You’ll be sitting for hours and walking for miles.
- Bottoms: Joggers, leggings, or comfortable pants. Avoid anything with a complicated belt.
- Top: A soft t-shirt and a zip-up hoodie or cardigan. Layers are key, as plane temperatures are famously unpredictable. The zip-up is easy to remove for security.
- Shoes: Slip-on shoes (like sneakers or flats) are the pro move. You can slide them off and on at security without fumbling with laces.
- Avoid: Complicated jewelry, belts with metal buckles, or boots that are hard to remove. These all slow you down at the security checkpoint.
One Week Before Your Flight: The Final Countdown
This is it. The final week. The goal for this week is to get everything 90% done so you can be completely relaxed the day before you fly. Last-minute stress is a choice, and a pro chooses to avoid it.
Step 1: Confirm All Your Bookings
Log in and re-confirm everything. Check your flight time (has it changed?), your hotel reservation, and your airport transfer. A quick 15-minute check can catch a schedule change you might have missed in an email, saving you from showing up at the airport at the wrong time.
Step 2: Download Your Airline’s App
This is your new best friend. The airline’s app will have your booking, your digital boarding pass, and, most importantly, real-time flight status updates. It’s the fastest way to find out about gate changes or delays—often faster than the display boards in the airport. Log in and make sure your flight details are loaded and correct.
Step 3: Arrange for Your Home, Pets, and Mail
Who is watching your pet? Arrange the pet-sitter and write down all instructions. If you’ll be gone for a while, ask a neighbor to grab your mail or place a hold with the post office. Water your plants. Tidy up your home. Coming home to a clean house after a long trip is a pro-level gift to your future self.
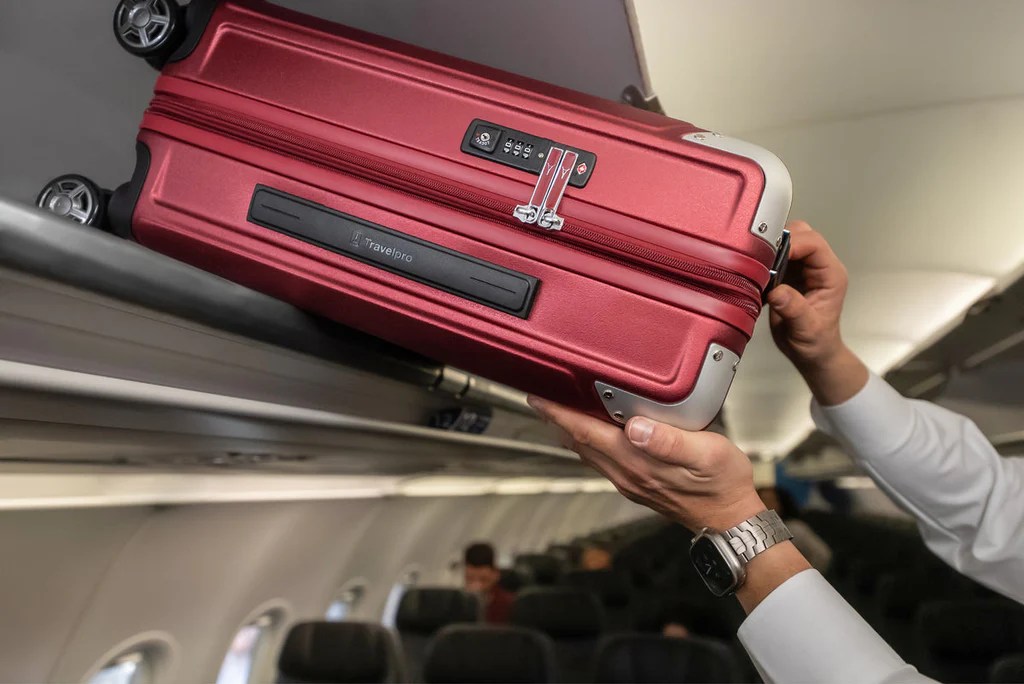
Step 4: Start Packing Your Checked Bag
Notice we’re not packing the carry-on yet. This is for your main suitcase. Lay out the packing list you made and start checking things off. A great pro tip is to use packing cubes. These small fabric cubes organize your clothes by type (all shirts in one, all pants in another) and compress them, saving you space and making it easy to find things without destroying your entire suitcase. Pack everything *except* your day-before and day-of essentials.
The 72-Hour Checklist: Getting Digital
You’re almost there. This phase is all about digital preparation. Your phone is your most powerful travel tool. It’s time to set it up for success.
Step 1: Check In Online (The 24-48 Hour Window)
As soon as your airline’s check-in window opens (usually 24 or 48 hours before your flight), do it. Set an alarm on your phone for this. Checking in online secures your spot, and if you’re on a fare that didn’t include seat selection, this is your best chance to snag a decent seat (like an aisle or window) before they’re all gone. If you’re paying to check a bag, you can also pay for it online now, which is often cheaper than paying at the airport.
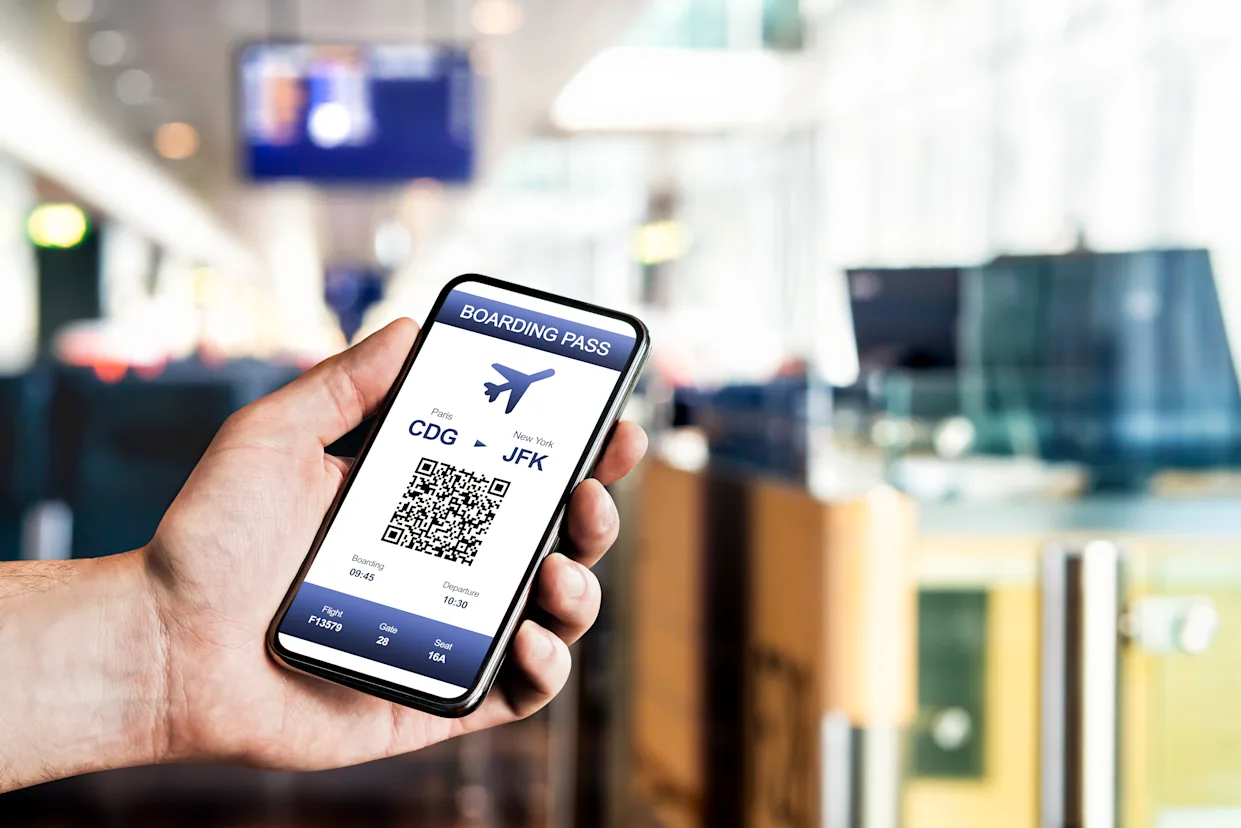
Step 2: Download Your Digital Boarding Pass
After checking in, your airline will issue your boarding pass. Save it to your phone’s digital wallet (like Apple Wallet or Google Pay). This is far more reliable than fumbling for a screenshot or trying to load a webpage with bad airport Wi-Fi. As a pro backup, take a screenshot of it anyway. Now you have two digital versions, plus you can always print a paper one at the airport kiosk if you’re really paranoid (which isn’t a bad idea).

Step 3: Finalize Your Carry-On Bag
Now it’s time to pack your carry-on. This bag is your lifeline. It should contain everything you need to survive for 24-48 hours if your checked bag gets lost, plus all your in-flight comfort items. Refer to the checklist in the next section, but the essentials are: medications, a change of clothes (underwear, socks, t-shirt), all electronics, chargers, and your travel documents.
Step 4: Charge All Electronics
Charge everything to 100%. Your phone. Your laptop. Your tablet. Your noise-canceling headphones. Your portable power bank. Pack all the necessary chargers (and a travel adapter, if needed) into one small pouch in your carry-on. A dead phone is a traveler’s worst enemy.
The Day Before Your Flight: Your Final 24-Hour Prep
This is it. The big day is tomorrow. Your goal today is to do as little as possible. You’ve prepared for this. Today is just about the final touches, triple-checks, and getting yourself physically ready for the journey.
Step 1: The Ultimate Carry-On Checklist (Triple-Check This!)
Lay this all out on your bed. Do not zip your carry-on until you have physically touched each item.
| Category | Item Checklist | Pro Tip |
|---|---|---|
| Documents (Go-Folder) | Passport/ID, Boarding Pass (Digital + Paper), Visa docs, Hotel/Car info. | Keep this in one small, dedicated folder or wallet. Never put it in a seat-back pocket! |
| Electronics | Phone, Laptop/Tablet, Power Bank, All Chargers, Headphones (noise-canceling are best). | A fully charged power bank is your #1 travel gadget. |
| Health & Comfort | ALL prescription meds, Pain reliever, Neck pillow, Eye mask, Earplugs. | Planes are dry. Add lip balm and a small hand lotion (under 3.4oz). |
| Essentials | Empty Reusable Water Bottle (to fill post-security), Snacks, Change of Clothes. | Pack snacks! Airport food is expensive and airline offerings are minimal. |
| Liquids Bag | Your 1-quart bag with all 3.4oz-or-less toiletries. | Pack this at the very top of your carry-on for easy access at security. |
Step 2: Prepare Your “Go-Folder”
Get a specific, brightly-colored travel wallet or folder. Put your passport, ID, and a paper copy of your boarding pass inside. This is your “Go-Folder.” From this moment on, you will always know exactly where your most important documents are. You’ll put this in a secure, easily accessible pocket of your carry-on bag.
Step 3: Hydrate and Eat Smart
Your preparation is physical, too. Flying is incredibly dehydrating. Start hydrating today. Drink more water than you normally would. Avoid excessive salt, which causes bloating, and heavy, greasy foods that will make you feel sluggish. A light, healthy dinner is the pro move. A 2022 study on in-flight health found that passengers who were well-hydrated before their flight reported 40% fewer symptoms of jet lag, like headaches and fatigue.
Step 4: Set Multiple Alarms
Don’t trust one alarm. Set one on your phone. Set one on a clock. If you’re paranoid, set one on your tablet, too. Calculate your wake-up time by working backward:
[Flight Time] – [3 Hours at Airport] – [Travel Time to Airport] – [1 Hour to Get Ready] = Your Wake-Up Time.
Yes, 3 hours at the airport for an international flight (2 for domestic) is the pro standard. Rushing is for amateurs. Pros wait calmly at the gate.
Departure Day: Your Step-by-Step Execution
It’s here! But because you’re a pro, you’re not stressed. You’re just executing a plan. Today is all about smooth, calm, step-by-step motion.
Step 1: Final Home Check
After you’re dressed (in your pre-planned airport outfit) and your bags are by the door, do a final walkthrough of your home. Check that all windows are locked, all faucets are off (no drips!), all lights are off, and the thermostat is set to an energy-saving temperature. Take out the trash. This 5-minute check provides total peace of mind.
Step 2: Getting to the Airport (On Time)
You already know when you need to leave. Check your ride-sharing app or traffic app (like Waze or Google Maps) for any unexpected closures or delays *before* it’s time to go. The goal is to walk through the airport doors at least 2 hours before a domestic flight or 3 hours before an international flight. This isn’t “wasted time”; this is your buffer against the unpredictable (long lines, security issues, etc.).
Step 3: Navigating the Airport: Bag Drop & Security
This is where the prep pays off.
- Bag Drop: Since you already checked in and paid online, you can skip the massive check-in line and go straight to the “Bag Drop” counter. It’s almost always a fraction of the wait.
- Security Line: Have your “Go-Folder” ready (boarding pass and ID out). As you approach the conveyor belt, you’re already prepared. Slip off your shoes. Your liquids bag is at the top of your carry-on, ready to be placed in a bin. Your laptop/tablet comes out easily. You move through with calm efficiency while others are frantically digging through their bags.

Step 4: At the Gate: Waiting Like a Pro
You’ve cleared security with plenty of time. Now what?
- Find Your Gate: Walk to your gate immediately. Confirm on the screen that it’s the correct flight and it’s on time. Now you know where you need to be and when.
- Fill Your Water Bottle: Find a water fountain and fill up that empty reusable bottle you brought. Staying hydrated is your #1 in-flight mission.
- Use the Restroom: Go to the bathroom *before* they announce boarding.
- Relax: You’ve earned it. Find a seat, connect to the Wi-Fi, and relax. Don’t crowd the gate. They will call your boarding group. A pro waits patiently for their turn.
Level Up: Advanced Pro Tips for a Better Flight
You’ve mastered the fundamentals. Now it’s time for the advanced moves that separate the pros from the merely prepared.
Beating Jet Lag Before It Starts
Jet lag is a fight against your internal body clock. The battle starts before you fly. If you’re flying east, try to go to bed an hour or two earlier for a few nights leading up to your flight. If flying west, do the opposite. As soon as you get on the plane, set your watch and phone to your destination’s time zone. If it’s daytime there, try to stay awake. If it’s nighttime, try to sleep. This tricks your brain into adjusting faster.
Staying Comfortable and Healthy In-Flight
- Move: Sitting for that long is not healthy. Get up, stretch, and walk to the back of the cabin at least once every 90 minutes to keep your blood flowing and prevent deep vein thrombosis (DVT).
- Hydrate, Hydrate, Hydrate: We’ve said it a lot because it’s that important. The cabin air is drier than a desert. Drink water constantly.
- Avoid Alcohol and Caffeine: Both are diuretics and will dehydrate you even faster, making you feel worse when you land.
Dealing with Delays and Cancellations
A pro knows that delays happen. Panicking doesn’t help. Action does.
If your flight is delayed or canceled, everyone will rush the gate agent’s desk. Don’t just stand in that line. Pull out your phone.
1. Call the Airline: Get on the phone with the airline’s main customer service line. You’ll often get an agent faster than the person at the gate.
2. Use the App: Many airline apps will automatically allow you to rebook yourself on the next available flight right from your phone.
3. Know Your Rights: If the cancellation is the airline’s fault (like a mechanical issue), you are often entitled to a hotel voucher and meal vouchers. If it’s weather, you’re usually on your own. Be polite, but firm.
Using Airport Lounges
Airport lounges aren’t just for first-class passengers. Many travel credit cards offer lounge access as a perk. You can also often buy a day pass. For a long layover, this can be incredibly worth it. Lounges offer free Wi-Fi, comfortable and quiet seating, free food and drinks, and cleaner restrooms. It’s the ultimate way to wait for your flight like a true pro.
Frequently Asked Questions About Flight Preparation
- 1. When should I really get to the airport?
- The pro rule is 2 hours for domestic flights and 3 hours for international flights. This buffer accounts for unexpected traffic, long security lines (especially during holidays), and gives you time to get to your gate without running.
- 2. What is the 3-1-1 liquids rule again?
- It’s easy to remember: All your liquids, gels, and creams must be in containers of 3.4 ounces (100ml) or less. All these containers must fit inside 1 clear, quart-sized plastic bag. And you are allowed 1 such bag per passenger.
- 3. Can I bring a disposable razor in my carry-on?
- Yes, disposable razors and their cartridges are permitted in carry-on bags. However, straight razors and safety razors (where the blade itself is removable) are not, and must be in your checked luggage.
- 4. What should I do if I miss my flight?
- Don’t panic. Go straight to the airline’s ticket counter (not the gate agent). Explain what happened calmly. Many airlines have an unofficial “flat tire rule” and may be able to get you on the next available flight, either for free or for a small fee, if you arrive within a couple of hours of your original departure.
- 5. Why do I need to check in online if I have a seat?
- Checking in online confirms your intention to fly. On oversold flights, passengers who haven’t checked in are often the first to be bumped. It also saves you time at the airport and gives you the best shot at changing your seat if you don’t like the one you were assigned.
- 6. What is the single best thing to wear on a plane?
- Layers. The best outfit is comfortable pants (like joggers), a t-shirt, a zip-up hoodie or cardigan you can easily remove, and slip-on shoes. This combo is comfortable for sitting and efficient for security.
- 7. Can I bring my own food through airport security?
- Yes, absolutely! Solid food items (sandwiches, salads, snacks, fruit) are perfectly fine. You can save a lot of money by bringing your own food. Just be aware that “liquid” food items (like yogurt, soup, or peanut butter) are subject to the 3-1-1 rule.
- 8. How can I avoid checked baggage fees?
- There are a few ways: 1) Pack in a carry-on only. 2) Get an airline-branded credit card, which almost always includes a free checked bag. 3) Fly on an airline (like Southwest) that doesn’t charge for the first checked bag. 4) Pay for your bag online in advance, as it’s almost always cheaper than paying at the counter.
- 9. What documents do I really need to have handy?
- At a minimum, you need your government-issued photo ID (like a driver’s license or passport) and your boarding pass (digital or paper). For international travel, you must have your passport, and you should also have a copy of your visa (if required) and your return or onward ticket, as some countries require proof of departure.
- 10. How can I sleep on a long-haul flight?
- It’s the holy grail of flying. The pro kit includes: a good U-shaped neck pillow (memory foam is best), a quality eye mask to block all light, and a pair of earplugs or noise-canceling headphones. Avoid caffeine and alcohol, and try to book a window seat so you have something to lean against.
You’re Ready for Takeoff!
Traveling like a pro isn’t about some innate, magical skill. It’s about preparation, planning, and process. By following this step-by-step guide, you’ve shifted all the stress and panic from departure day to the weeks and months before, breaking it down into small, manageable tasks.
You’ve checked your documents, booked a smart flight, packed with purpose, and created a digital-first travel wallet. You have a plan for every stage, from your couch to the airport gate. The next time you fly, you won’t be one of the frantic, stressed-out passengers. You’ll be the one gliding through security, grabbing a coffee, and relaxing at the gate, completely confident and ready for the adventure ahead. That’s how you prepare for a flight like a pro.
Plan your 2026 holiday in advance with TravelUp and save £50 extra with TU50 Minimum Booking Required £1000 Only!Book Now!🌍 Travel Resources 2025
Looking for the best travel tools and websites this year? Our Travel Resources Hub covers flights, hotels, gear, insurance, and more. Smarter booking starts here.
🌍 Explore Travel Resources
Leave a Reply