

I put this together because winter trips can be hard to photograph. The cold air drains batteries, light changes fast, and snow can wash out color. I want to share simple steps that move you from unsure to confident when you step outside with your camera. You will see how small tweaks change the look of a snowy scene.Tips for Travel Photography winter landscapes.
Who this is for If you love travel photography and winter days, this guide is for you. Whether you chase quiet towns after a snowfall, frosted forests, or blue hour bays, you want photos that feel real. This is for beginners and curious hobbyists who want stronger results on cold trips.
What you’ll get Here you will find practical steps you can use on your next trip. Plan ahead, check gear, and prepare for fast light changes. You will learn techniques for snow, ice, and low light. You will get tips on weatherproofing gear, keeping batteries going, and staying warm. You will also learn how to tell a simple story with a winter scene. A plain checklist and a light editing approach will help keep color true.
Let’s break it down into four parts: planning, gear, technique, and care. Start with weather and location planning so you know when to shoot. Use a tripod in dim light. Bring extra batteries and a heat pack. A fast lens helps isolate a subject. These moves keep your shots steady and clear, even in cold air.
Common questions How do I keep whites from blowing out? How can I add depth when the world is all white? What if the sky looks dull? The answers come with practical moves: bracketing exposure, shooting RAW, watching the histogram, and using color from trees, water, and sky to keep your image lively.
Next steps Ready to try? This guide walks you through a field-ready checklist and a simple editing plan that keeps colors real. Pack light but bring a spare battery, a cloth, and warm gloves. When you read, try a small trip now and test one new idea. Then build on it on your next journey.
Contents
- 1. Timing is Everything
- 2. Dress for Success
- 3. Use a Tripod for Stability
- 4. Embrace Negative Space
- 5. Focus on Textures
- 6. Play with Contrast
- 7. Capture Movement
- 8. Use Reflective Surfaces
- 9. Post-Processing Magic
- 10. Tell a Story
1. Timing is Everything

Here is why timing matters in winter photography. The light is soft and easy to miss. The right moment turns simple scenes into magic. You can ride that light if you plan.
– Scout locations: Before light, walk the area. Find a foreground that adds depth, frost on grass, a frozen stream, or snow-dusted pines. Aim for a spot where the sun will peek through and warm the scene at the golden hour.
– Use apps: Check sunrise and sunset times with a sun-tracking app. Save a window when colors should peak. Set a reminder so you don’t miss the moment.
– Embrace the weather: Clouds stretch color across the sky. Snow smooths edges and adds quiet. Frost sparkles as the sun climbs. Gray skies can still give mood.
– Plan for speed: Winter light fades fast. Have a simple shot list. Know what you want in frame and where you will stand.
– Pack smart: Bring a light tripod, extra batteries, and warm gloves. Cold air drains power and can make handling gear tough.
Here are practical tips to apply: arrive early, check exposure, and stay flexible. Next steps: practice timing on every trip, and you’ll catch those pinks and golds before they vanish.
In winter travel photography, timing isn’t just important; it’s magical. Embrace the soft light of dawn and dusk to transform everyday scenes into breathtaking winter landscapes!
1. Timing is Everything
Editor’s Choice

Amazon Basics 127 cm (50 Inch) Lightweight Tripod with Bag, Champagne
 Amazon£17.04

USA Gear Camera Bag in Neoprene with Adjustable Shoulder Sling, Shoulder…
Amazon£29.99
Running Gloves, Touch Screen Anti-slip Lightweight Gloves Liners for Cyc…
Amazon£9.01
2. Dress for Success

Winter shoots demand smart warm gear. Cold hands slow your shots and hide the small details you want to capture. Warmth keeps you steady, alert, and ready to react to light and frost.
Here is why dressing right makes a difference, and how you can do it.
– Layer Up. Start with a moisture-wicking base layer. Add a warm mid layer, like fleece or a light down piece. Top it with a windproof, water-resistant shell. This combo locks in heat without making you feel bulky. Choose breathable fabrics so sweat can move away from your skin.
– Protect the Hands. Gloves are your best friends. Go for a pair that stay warm and let you press small buttons. If you later need dexterity, switch to fingerless liners inside insulated gloves. Mittens can be great too, but they slow you a bit—practice with both so you know what works in your hand.
– Head, Neck, Feet. A warm hat that covers the ears matters. Add a scarf or neck gaiter to block the cold wind. Wear insulated, waterproof boots and wool or synthetic socks. Dry feet stay happy feet.
– Move Without Overheating. Look for a jacket with vents or zippers you can open when you heat up. Layering helps you shed heat fast without losing warmth.
– Small Comforts. Hand warmers, extra socks, and a compact pack to stash a thinner layer can save you on long shoots.
Next steps: plan your kit the night before. Pick base, mid, and shell pieces that fit your climate. With the right setup, the cold becomes part of the scene, not a hurdle to your vision.
Keep your hands warm and your creativity flowing! Dressing in layers not only keeps you cozy but also ensures you’re always ready to capture those breathtaking winter landscapes.
2. Dress for Success
Editor’s Choice
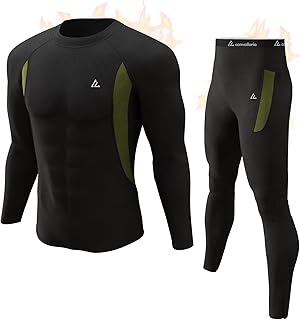
Men’s Thermal Underwear Long Johns Set Mens Winter Gift Hunting Gear Spo…
Amazon£21.99
Photography Gloves for Professional Photographers Outdoor for Winter, He…
Amazon£34.99
Mens Winter Boots Waterproof Insulated Snow Boots Outdoor Non Slip Lace-…
Amazon£30.59
3. Use a Tripod for Stability

Winter shoots bring dim light and cold hands. Your camera can shake when you press the shutter. A tripod gives you a solid base for every shot. With that base, you can use longer shutter speeds without blurry results.
– Sharp images: A steady frame keeps your photos crisp in dim light.
– Creative compositions: You can plan angles and viewpoints without fighting camera shake.
– Long exposures: Let clouds drift and water flow slowly to add drama.
A good tripod helps a lot. Look for a sturdy build that stands up to wind and cold. Metal legs with grippy feet work well on ice. Choose a model with a weight hook to add ballast on windy days. If you can, bring a bag of sand or a small rock to steady it.
How to use it well:
– Keep the center column low. It cuts shake.
– Extend the legs gradually. A wider stance helps on snow.
– Use a remote or timer. You do not press the shutter when it opens.
Next steps: practice setups on snow, test different angles, and check your shots after a chilly day.
3. Use a Tripod for Stability
Editor’s Choice

Victiv Tripod for Camera 72inch, Lightweight Aluminum Tripod for Travel,…
Amazon£36.99
Wireless Bluetooth Camera Shutter Remote Control for Smartphones – Creat…
Amazon£3.26
4. Embrace Negative Space

Struggling to make your winter photos feel spacious and calm? Negative space helps. The trick is to leave open areas around your subject so the scene breathes. Here’s how to use it well.
– Choose a strong subject a lone pine, a distant ridge, or a single hiker against a soft snow backdrop.
– Place it off center shift your subject toward a third of the frame for balance and quiet tension.
– Shoot wide capture a broad view that shows the endless snow and sky; let the empty area carry mood.
– Keep the view clean watch for tracks, poles, and clutter that steal space. Move or wait for a clearer frame.
– Use the sky as space a pale blue sky becomes the negative space and gives your subject room.
– Play with light early light or blue hour adds texture on snow and depth to the empty zone.
– Tell a story with space the gap can feel lonely or serene. Match your subject’s pose to the mood.
– Practice and compare take a tight shot too, then a wide one. See how the space changes feeling.
Negative space can calm a crowded feed and spotlight your subject. Next steps: practice in clear light and compare with your old shots. You will see space as a key tool.
4. Embrace Negative Space
Editor’s Choice

zalati Kaleidoscope Lens Semicircle Special Effects Camera Glass Filter …
Amazon£15.99
Victiv Tripod for Camera 72inch, Lightweight Aluminum Tripod for Travel,…
Amazon£36.99
5. Focus on Textures

Here is why textures matter in winter photos. They add depth and tell a story without words.
Next steps: turn ordinary snow and ice into mood with three moves.
– Get Close: Try macro shots of snowflakes, ice ridges, or frost on a rock. You will see tiny dots, lines, and patterns your eye misses.
– Play with Light: Change your angle. Let sun, street lights, or a glow on ice create reflections and deep shadows. Those contrasts make surfaces feel real.
– Mix It Up: Put soft snow next to rough bark, or a smooth ice sheet beside grainy wood. A single frame with different textures feels alive.
Tips to make this practical: shoot RAW so you keep texture in the whites and shadows. Check your histogram to avoid losing detail. Use a tripod for steady close-ups. If wind shakes the scene, brace yourself or wait for calm moments.
Texture work can slow you down, but the results can pay off. You’ll create images that show the feel of the cold without needing words.
Practice with short walks. Look for texture on the ground, on tree bark, on a frozen stream, or on metal railings. Next steps: try these three moves on your next winter outing and compare results.
Textures in winter landscapes tell a story beyond words. Get close, play with light, and mix it up to capture the true essence of winter travel photography!
5. Focus on Textures
Editor’s Choice

K&F CONCEPT 75″/190cm Compact Camera Tripod, Lightweight Travel Tripod f…
Amazon£34.99
6. Play with Contrast

Here is why contrast matters in winter travel photos. You can turn a quiet snowy day into a vivid moment.
– Foreground against background: Look for dark branches or a fence set on white snow. The dark line pops and adds depth.
– Color pops: A single bright color grabs the eye. Imagine a red barn or a rider in a bright jacket. The splash of color leads the viewer.
– Silhouettes: Shoot with the light behind your subject to turn trees or ridges into bold shapes. Silhouettes feel clean and dramatic.
Let’s break it down with quick field tips.
– Expose for the highlights: Snow can fool the meter. Let the bright areas glow without washing out texture.
– Keep texture: Use manual exposure or a small exposure shift to protect snow detail.
– Shoot RAW: You can adjust white balance and contrast later without losing data.
– Layer the scene: Find a strong foreground piece, a clear middle, and a bright background to create depth.
– Try bracketing or a tiny HDR: When light is uneven, several exposures blended later work well.
– Time it right: Early morning or late afternoon light gives long shadows and rich contrast.
Next steps:
– Pick a focal point, set exposure, and check the histogram.
– Capture a few variations, then review for the strongest contrast.
6. Play with Contrast
Editor’s Choice

Lightweight Tripod 55-Inch/135cm, Video/Phone/Light Camera Tripod Stand …
Amazon£15.99
Professional Camera Cleaning Kit with Blowing Bottle, Cleaning Solution,…
Amazon£13.99
7. Capture Movement

If you want your winter photos to feel alive, capture movement. Movement can turn a quiet scene into a story.
Here is why movement works in winter light: it leads the eye, adds texture, and shows how wind shapes snow.
Let’s break it down with practical steps you can try on your next shoot.
– Long Exposures: Set a tripod and lower your shutter speed to blur what moves. Try 1/15 to 1/2 second to soften falling snow or rustling branches. Keep ISO low and use a remote or timer so you avoid camera shake.
– Action Shots: Catch people skiing, kids tossing snow, or a dog chasing a ball. Use faster speeds like 1/200 to 1/500 second to freeze motion. Burst mode helps you grab the peak moment, then pick the best frame.
– Smart Composition: Let motion guide the eye. Use leading lines from tracks, fences, or streams. Put the moving element off-center and add a clear foreground to create depth.
– Motion Techniques: Try panning to blur the background while the subject stays sharp. Start around 1/60 to 1/125 second and follow your subject with steady movement.
Next steps. Practice with a windy day or a snowy scene. Review your shots, note what worked, and adjust. With patience, your moving snowframes will feel smoother and more alive.
Embrace the dance of winter! Capturing movement in your photos brings life to the serene beauty of winter landscapes. A gentle blur can tell a story that stillness often hides.
7. Capture Movement
Editor’s Choice

Victiv 67.7″ Camera Tripod, Camera Stand Lightweight Tripod for Smartpho…
Amazon£24.69
Wireless Bluetooth Camera Shutter Remote Control for Smartphones – Creat…
Amazon£3.26
Fotasy 35mm F1.6 Large Aperture Manual Prime Lens APS-C for E-Mount, 35 …
Amazon£29.29
8. Use Reflective Surfaces

If you want to add a quiet sparkle to your winter photos, reflections are a simple boost. Here is why they work: they add mood and depth without shouting for attention.
– Find Still Water After a fresh snowfall, lakes can look like glass. Go out early when the wind is calm. Move slowly and test the surface before you step on any ice.
– Angle Your Shots Try close to the water level or shoot from a higher view. Change your position to find the best mirror line. Let the horizon sit on the top or bottom third for a strong, balanced look.
– Include the Sky Let clouds, blue sky, and trees ride in the reflection. A bright sky can balance dark shapes in the water and ice.
– Tools and Technique Use a tripod to keep the shot steady. A polarizing filter can cut glare and bring back color. If needed, bracket exposure to hold both bright and dark spots.
– Be Honest About Limits Not every day gives a perfect mirror. Some mornings are misty or the surface stays choppy. If the scene breaks, switch to a tighter frame with a snow bank or fence to keep the photo strong.
– Next Steps Practice at different spots to see what looks best. Reflective surfaces can give your winter work a calm, inviting feel.
8. Use Reflective Surfaces
Editor’s Choice

RISEOFLE Phone Tripod & Selfie Stick, 180cm Aluminum All in One Extendab…
Amazon£13.99
K&F Concept 67MM Polarising Filter Circular Polarizing CPL, Ultra Slim, …
Amazon£13.99
9. Post-Processing Magic

Winter scenes gain life when you edit. Raw photos often miss the mood you felt. Post-processing brings back color, light, and texture. You can make a snowy day feel warm or crisp, depending on your goal. Here is why editing matters and how you can do it quickly.
– Start with color balance Move the temperature slider to warm or cool; a touch of warmth makes snow feel inviting.
– Boost contrast thoughtfully Add a touch more contrast to make snow sparkle and shadows pop.
– Sharpen the key details Sharpen only the main subject to keep the sky and snow smooth.
– Protect highlights, recover shadows Check bright areas to avoid clipping and bring back detail in dark corners.
– Reduce noise in dark areas If noise appears in shadows, use gentle noise reduction.
– Enhance texture and clarity A small boost in texture helps frost and ice catch light.
– Handle lens corrections Enable lens corrections and fix distortion when needed.
– Prepare for export Save versions for web and print, using proper sharpening and size.
Keep a copy of the original.
Practice makes you faster and more confident.
Next steps: pick one winter shot, edit twice, compare results, and save your best version.
9. Post-Processing Magic
Editor’s Choice

Adobe Photoshop Lightroom Classic For Dummies (For Dummies: Learning Mad…
Amazon£22.98
10. Tell a Story

Your winter photos can do more than look nice. They can take a viewer on your trip. A clear story helps people feel what you felt. Here is why you should tell a simple story with every shot.
– Include People Capture moments with friends or family to add warmth and life.
– Capture Details Shoot close-ups of things you love, like a mug of hot cocoa, your gloves, or footprints in fresh snow.
– Create a Series Plan a small set of images that together show your journey, not just one scene.
Next steps shape your idea into a real sequence. Start with one idea. Pick a theme, then imagine three scenes that show it. Shoot from wide to tight to pull viewers in. Keep it simple so the thread stays clear.
– Pick a Theme Choose a feeling or moment that can carry your shots.
– Sketch Three Scenes Plan a wide shot, a middle shot, and a close detail.
– Shoot in Order Record in natural light and move slowly.
On location, look for flow. Start wide to show the place. Step closer to show how you felt. End with a small detail that stays in memory.
Captions matter. Add a brief line that anchors the story. Share what surprised you.
Next steps: practice with a short, four-photo set on your next trip. With practice, you can turn one trip into a lasting memory. Start with a small set today.
10. Tell a Story
Editor’s Choice
K&F CONCEPT 75″/190cm Compact Camera Tripod, Lightweight Travel Tripod f…
Amazon£34.99
Camkix Camera Lens Cleaning Kit – Air Blower, 2in1 Lens Cleaning Pen, Cl…
Amazon£8.99
UnionSine HD2510 500GB USB 3.0 Ultra Slim Portable External Hard Drive H…
Amazon£26.00
Conclusion

Winter travel photography is an exhilarating way to explore and capture the beauty of the season.
With these tips, you’ll be prepared to create stunning landscapes that reflect the magic of winter.
So, grab your camera, bundle up, and head out to embrace the enchanting world around you!
Note: We aim to provide accurate product links, but some may occasionally expire or become unavailable. If this happens, please search directly on Amazon for the product or a suitable alternative.
This post contains Amazon affiliate links, meaning I may earn a small commission if you purchase through my links, at no extra cost to you.
Frequently Asked Questions
What Are the Best Times of Day for Winter Travel Photography?
Timing is crucial in winter travel photography! The best times are usually during the golden hour, just after sunrise and before sunset. During these times, the light is soft and warm, creating magical scenes that can transform ordinary landscapes into stunning photographs. Plan your shoots around these hours to make the most out of the natural light!
How Do I Keep My Camera Equipment Safe in Cold Weather?
Keeping your camera safe in cold weather is essential for successful winter travel photography. Always keep your camera in a warm bag when not in use to prevent batteries from draining quickly. Additionally, consider using weather-sealed gear and a protective cover to shield your equipment from snow and moisture. If you notice condensation forming when moving from the cold to a warmer environment, let your camera acclimate before using it again!
What Should I Wear to Stay Warm While Shooting Winter Landscapes?
Dressing appropriately is key to enjoying your winter photography adventure! Opt for layers, including a thermal base layer, an insulating middle layer, and a waterproof outer layer. Don’t forget warm gloves—consider fingerless ones for better dexterity while shooting. Keeping your extremities warm helps you stay focused and ready to capture those stunning winter landscapes!
How Can I Improve the Colors in My Winter Photos?
Winter scenes can sometimes appear washed out due to the snow. To enhance colors in your winter travel photography, try adjusting the white balance settings on your camera. A warmer tone can make snow look more inviting. Additionally, during post-processing, you can boost the saturation and contrast to bring out the vibrant hues, making your winter landscapes pop!
What Are Some Tips for Capturing Movement in Winter Photography?
Capturing movement in winter landscapes adds life to your photos! Look for elements like falling snowflakes, flowing water, or animals in motion. Use a faster shutter speed to freeze action or a slower shutter speed to create a beautiful blur effect that conveys motion. Experimenting with these techniques can give your winter photography a dynamic edge!
🔗 Keep exploring Travel Vibe: ❓ Travel FAQ Hub | 🌍 Travel Resources | ❄️ Winter Travel | 🏙 City Breaks
Country in the Spotlight
Spain Travel Guide
Our featured destination — complete travel guide, tips & planning advice.
Explore SpainExplore Other Destinations
- Italy
- Thailand(coming soon)
- Portugal (coming soon)
- Japan (coming soon)
Explore our best travel guides
Best time to visit destinations worldwide
Month-by-month travel weather guides and seasonal tips
Travel planning guides & itineraries
Routes, budgets, packing lists and trip planning advice
City breaks and short escapes
Weekend trips, European cities and quick getaway ideas
Best honeymoon destinations for 2026
Romantic, luxury and unique honeymoon travel ideas
Leave a Reply